

My wish is to have everyone try and make homemade rolls. It is easier than you think. All you need is a little desire, a mixer with a bread hook and a thermometer that can measure the temperature of water.
Easter is on its way. Can you just imagine a dinner table with homemade rolls? It is the perfect time to try and make them for the next two weekends in preparation for Easter Sunday. Maybe you will have more time on a Saturday instead of a Sunday morning to give it a shot, but give it a shot! I believe you can make them and you will rock at it!

How to Make Homemade Dinner Rolls
1. Using a thermometer to measure the water temperature is key! Once I figured out that the water temperature for making bread needed to be between 105° and 120°, it was a game changer.
My mom always had me check the water temperature with my hand. She told me the water should be lukewarm. What feels lukewarm to one person feels completely different to another. After buying a thermometer, I realized the water to make bread needs to be hotter than I thought!
2. Put the yeast in a bowl with the warm water. I love using a glass two cup measuring cup. It is exactly the amount of water I need and it has a spout. This makes pouring it into the mixer so much easier.
3. Sprinkle some sugar into the yeast/water mixture. Yeast loves sugar and it will begin to react faster if you feed it. Be prepared with all your other ingredients because the yeast will begin to bubble up. You want to be ready to pour it into the mixer before the foam starts to overflow the rim of your container.
4. Put eggs into the mixer and beat while you are getting the yeast ready.
5. Melt the margarine in the microwave. I always leave the wrapper on. The wrapper will keep the margarine from bubbling up and popping all over the top of your microwave. Nothing like having to clean your microwave while you are making rolls!
I love adjusting the power on my microwave to a lower level so the margarine does not melt too fast. I put the margarine in a glass two cup measuring cup. I set the microwave to one minute and put the power at level 5. If it has not melted enough, I set the microwave again for one minute at power level 5.
6. Add sugar to eggs and beat until smooth.
7. Gradually add the melted margarine into the egg mixture. Take the margarine out of the wrapper and then stir it up with a fork to make sure it is melted and liquified. By melting on power level 5 I keep the margarine from overheating. This keeps the temperature low so the eggs don't curdle.
8. Add the yeast and water to the eggs. Some people wonder why I use margarine over butter. Butter is heavier and will weigh the dough down. The rolls tend to be more dense with butter. Margarine makes lighter, fluffier rolls.
I have used butter when I did not have margarine on hand. I still love the rolls and they taste wonderful. Feel free to substitute butter for the margarine.
9. Gradually add 1 cup of flour then two more. When you have added three cups, change the whisk attachment to the dough hook attachment.
10. Add the salt and then add the remaining three - four cups of flour, gradually, one cup at a time.
11. You are looking for the dough to form a ball and start pulling away from the edges of the bowl. If there is any dough on the bottom of the bowl, keep adding flour a little at a time until it is one huge mass. When this happens, stop adding flour and let the machine do its magic!
We are living in a modern world! This is why making bread is amazing! Machines knead the dough for you. I actually have lived long enough to remember the days when mixers did not have dough hooks. Now, I let my mixer knead the dough for me. Once the dough is completely formed, I let it continue to knead in the machine for four minutes.
12. While the bread is kneading, spray a large bowl with cooking oil spray. You can also use wrappers left over from the margarine to grease the bowl. Pull the dough out of the mixer and place it in the greased bowl. Cover the bowl with plastic wrap that has also been sprayed with cooking oil. Place the sprayed side down so when the dough rises, it will touch the oil and keep it from sticking.
I have a large orange/yellow Tupperware bowl I have had for years that I always put my bread in. It is my bread bowl. I need to use two pieces of plastic wrap over the top of this bowl to cover it. I make the plastic wrap pieces a little longer than my bowl. Then I use them again when I roll out the dough. I place one piece over one cookie sheet and repeat with the second.
13. Let the dough rise for two hours. I always plan my day around making bread. I try to think of things I need to do, like shopping or cleaning and save those chores for the two hours the bread is rising.
Making bread is a 4-5 hour window. Twenty minutes to make the dough. Two hours for the first rise. It takes about 20 - 30 minutes to roll out the the individual rolls. Then two hours for the second rise.
14. Once the dough has doubled in size, or it has been rising for two hours, divide the dough into four equal parts. Roll out each quarter into a large circle. Cut it into 16 equal pieces, like you would a pie.
I use my kitchen scale when cutting my dough into quarters. Each quarter weighs about 1 pound and 12 - 13 ounces. Although I make sure each quarter is the same weight, my rolls are never the same size. Although I try every time to have rolls the exact same size, it never happens. I have learned to embrace this!
15. To make a crescent roll, start at the fat end of each piece of dough. Roll it loosely until the point wraps around and place it, point side down, on a greased cookie sheet. Place them four across and four down. Do this again to fill up one large cookie sheet. There should be 32 rolls.
Do this all again for a second cookie sheet. You will have 64 rolls. If this is too many, (How is this possible?) cut the recipe in half.
16. Spray a piece of plastic wrap with cooking spray. Each piece should be large enough to cover one tray. Place the greased side of the plastic wrap next to the rolls. (Or you can use the same pieces you used to cover your bowl.)
The sheet of plastic does not need to cover everything or be wrapped around the edges. You can use a towel to cover the rolls too. I have found the plastic wrap keeps the heat in as the yeast is activating. I feel the rolls rise better with plastic wrap than with a towel.
17. Set the timer for 2 hours.
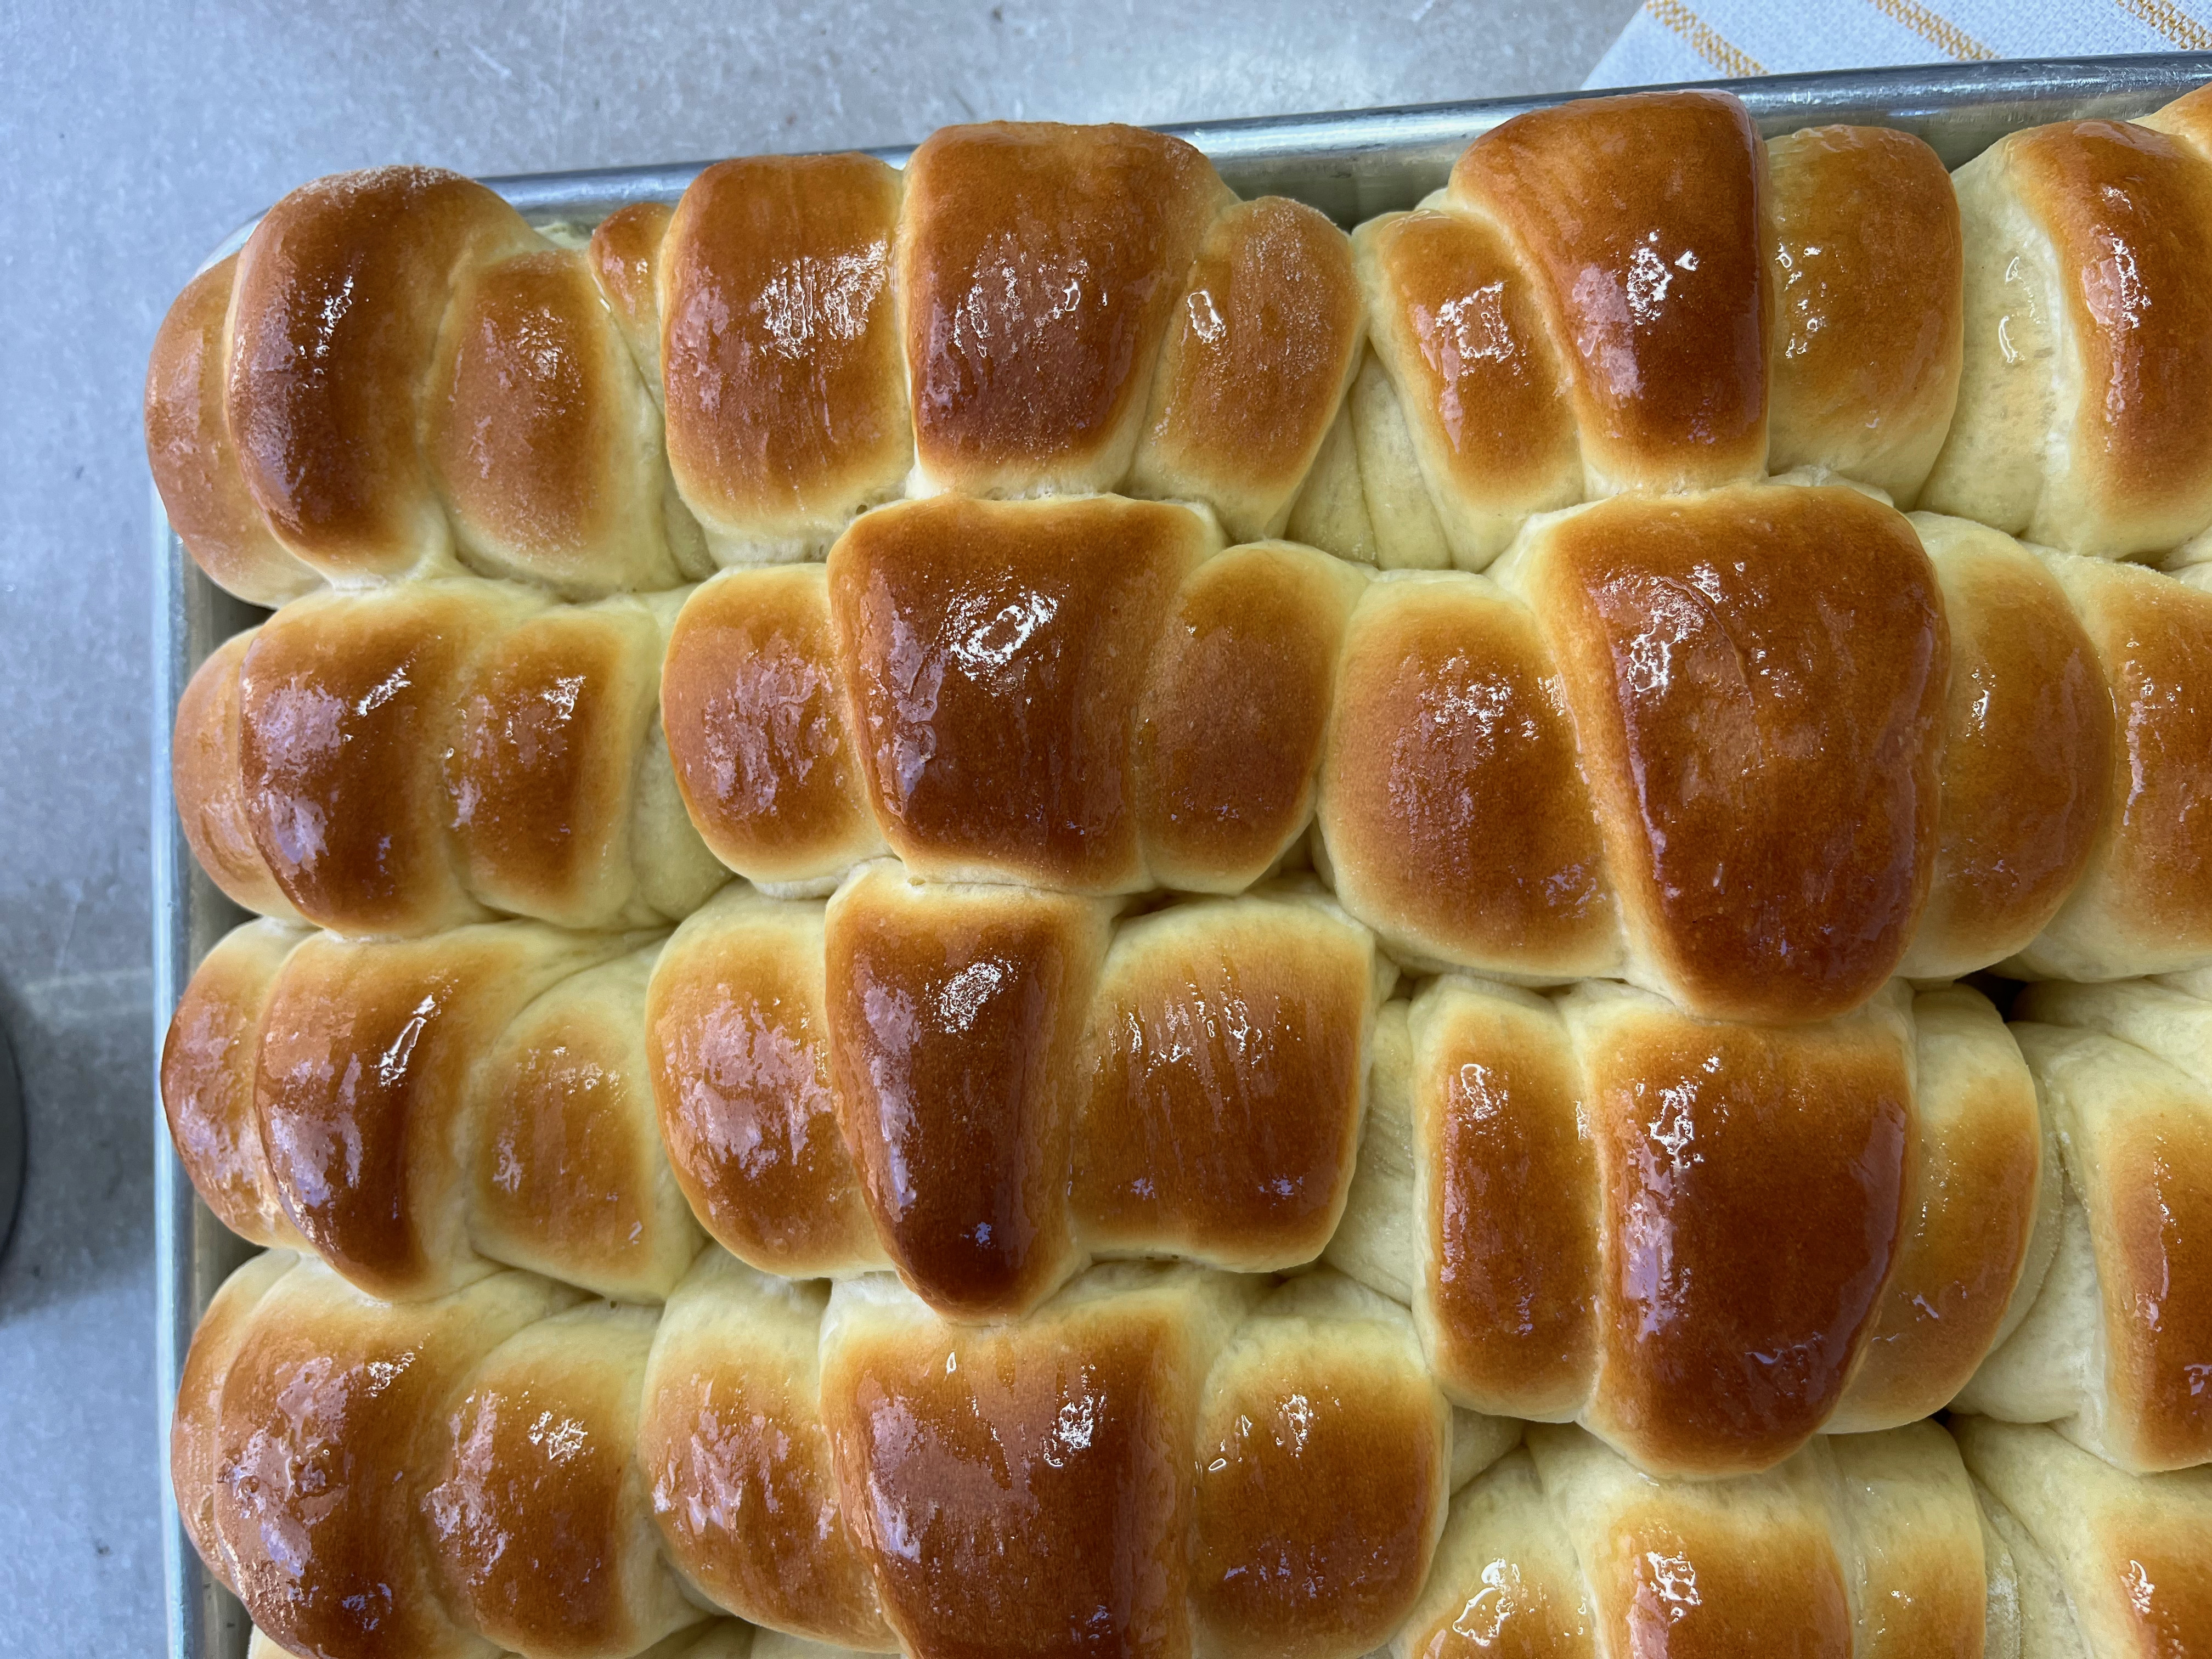
18. Preheat the oven to 375°. After the timer goes off, the rolls should have doubled in size. They are ready to bake. Take the plastic wrap off and place each cookie sheet in the oven. Cook for 10-12 minutes until the tops are golden brown. I like cooking my rolls one pan at a time.
When I put two pans in the oven at the same time, I have to stop in the middle of cooking and switch the trays. If I do not switch trays, the tops of the rolls on the bottom tray will not brown.
The other downside of cooking two trays at the same time is you reduce the oven temperature when you switch trays and it takes longer to bake.
19. Once you take the rolls out, let them cool for 5 minutes and then brush the tops with softened or melted butter.
20. These rolls will last a week if covered in an airtight container. After eating them with a meal, my favorite is to slather a roll with peanut butter inside and homemade jam. My grandchildren want this everyday when they come home from school.

Let me know on Instagram or Pinterest if you make these.
Post a picture and tag me @dinasdiner. I want to know how it turns out.
Homemade Dinner Rolls
2 Cups Warm Water (105° - 120°)
2 Tbsp. Yeast
2 tsp. Sugar
4 Eggs
1/2 Cup Sugar
1 Cup Margarine (You can use butter)
6-7 Cups Bread Flour
1 tsp. Salt
1/4 C. Butter, softened
1. Use tap water that registers between 105° - 120° with a thermometer.
2. Add yeast and 2 tsp. of sugar. Mix and set aside.
3. Beat eggs in mixer with a whip attachment.
4. Melt margarine in the microwave.
5. Add 1/2 cup of sugar to beaten eggs.
6. Gradually add melted margarine in a small stream into egg and sugar mixture.
7. Add one cup of flour then add yeast mixture.
8. Add 2 more cups of flour and then add salt.
9. Switch out the whip attachment for the dough hook.
10. Add 3-4 cups of flour, a cup at a time, until dough begins to form a ball and pull away from the side of the bowl. Do not add more flour. Continue to knead for 4 minutes in the mixer with a dough hook.
11. Grease a large bowl with cooking spray.
12. Place dough into the bowl and cover with plastic wrap that has been sprayed with oil.
13. Let rise for 2 hours.
14. Punch the dough down and cut into four equal parts.
15. Grease two cookie sheets.
16. Roll out each quarter into a large circle and cut into 16 pieces like you would a pie.
17. Roll each triangle of dough starting at the fat side and roll to the point.
18. Place point side down on a cookie sheet, four across and four down.
19. Do steps 16 - 18 until all the dough has been shaped into rolls.
20. Cover with plastic wrap that has been sprayed with cooking oil.
21. Let rise for 2 hours.
22. Preheat the oven to 375°.
23. Take off the plastic wrap and bake one tray at a time for 11-13 minutes.
24. Take out of the oven and let rest for 5 minutes.
25. Brush with softened butter.
